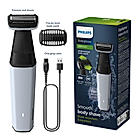
Body Trimmer for Men Clinically Tested for Sensitive Skin I Patented Pearl Tip & Hypo allergenic foil , Skin Safe Grooming , Trim or Shave Basis Your Style , Showerproof , 3 Year Warranty BG3007/01
2,049
- 2,699 (24% Off) Inclusive of all Taxes
Seller: Analemma Commerce Pvt. Ltd.
Additional Information:
- Quick Checkout - Enjoy Additional Offer on the Checkout
- 2 year warranty
- Free Shipping Over Rs. 2000
- Secure Checkout
- Genuine Product
Body Trimmer
2,049
- 2,699 (24% Off)
Overall Rating
0 reviews
0%recommend this product
Reviews
-
Cutting System
- Shaving element
-
Foil with two pre-trimmers
- Skin comfort
-
Skin protection system, Comfort in sensitive areas
- Length settings
-
1 fixed length setting
-
Accessories
- Comb
-
1 body comb (3 mm)
-
Design
- Handle: Ergonomic grip & handling
-
-
Ease Of Use
- Wet & Dry
-
Showerproof and easy cleaning
- Maintenance free
-
No oil needed
- Operation
-
Cordless use
- Secured length settings
-
-
Service
- 2-year guarantee
-
-
Power
- Run time
-
40 minutes
- Battery type
-
Ni-MH
- Charging
-
8 hours full charge
- Max power consumption
-
5 W
All Philips products consisting of a shaving foil are skin friendly. Philips is not a dermatological authority and cannot give skin, hair, or nail advice on individual cases.
Before using a Philips product with a shaving foil, it is good practice to visually check the device to ensure the shaving foil is still intact. To minimize the wear of the foil, safely store your product and protect the foil from outside pressure or impacts by attaching a cap or comb. Replace the foil immediately when it is damaged, via our webshop or your local Consumer Care.
You can use the shaving foil to trim and shave your body hair below the neckline, for example armpits, arms, legs and bikini or pubic area (with a trimming comb). When using the shaving head or trimmer in the intimate area (the outside and inside of outer labia), ensure you attach the trimming comb to the shaving head. We do not recommend using it on your face or head, because you will not get desired results, and it may also damage your skin.
Some products come with additional attachments to use on sensitive areas, like your pubic region. You can find more information about using these attachments this in your user manual or can contact us.
If you are still unsure of using Philips devices with a shaving foil, please consult your physician or healthcare professional who can examine whether your skin is suitable for this type of hair removal device.
After care
If you are a first-time user or have very sensitive skin, a little bit of irritation is possible and nothing to worry about. This goes away with time. We recommend applying a mild and alcohol-free moisturizing cream after shaving. If the irritation lasts longer than 3 days, then please consult your doctor.
The information on this page applies to the following models: BG3005/15, BRE710/00, BRT383/15, BG3006/15, HP6306/00, HP6341/00, BRT382/15, BG1024/16, BG1025/15, BG105/11. Click here to show less product numbers
Get exclusive deals on sign up
Products
Support
My Philips
My Philips / Product Registration
support search icon
Type about your issue or model number to get support
BODY groomers
Shaving
Bodygroom series 3000 Showerproof body groomer
Troubleshooting & support
Bodygroom series 3000
Showerproof body groomer
Model number
BG3005/15
View product specifications
Before using a Philips product with a shaving foil, it is good practice to visually check the device to ensure the shaving foil is still intact. To minimize the wear of the foil, safely store your product and protect the foil from outside pressure or impacts by attaching a cap or comb. Replace the foil immediately when it is damaged, via our webshop or your local Consumer Care.
We do not recommend using it on your face or head. This is because you will not get desired results, and it may also cause skin damage. Some products come with additional attachments to use on sensitive areas, like your pubic region. You can find more information about using these attachments this in your user manual or can contact us.
If you are still unsure of using Philips devices with a shaving foil, please consult your physician or healthcare professional who can examine whether your skin is suitable for this type of grooming device.
Areas to use Philips Body Groomer
Can I use my Philips Body Groomer without a comb?
The dual-sided body groomers let you switch between shaving & trimming. The shaver with rounded tips and foil adapts to the contours of your body for a smooth shave. The trimmer with comb has 5 different lengths for trimming anywhere on your body.
For trimming your body hairs, we advise using the integrated trimmer of the product with the adjustable trimming comb. The trimmer can be adjusted to 5 different lengths (1/8”(3mm) to 7/16”(11mm)).
When you want to trim hairs without the comb, limit the time to 5 minutes because the product will become warm. Consider the trimmer without comb trims close to the skin, do not use the trimmer head on sensitive areas e.g. pubic region without the comb attachment. You can use your groomer to trim and shave your body hair below the neckline for example armpits, chest and pubic area. We do not recommend using it on your face or head. This is because you will not get desired results, and it may also cause skin damage.
The information on this page applies to the following models: BG3005/15, BG3006/15, BG1024/16, BG1025/15, BG105/11.
Lady shavers and body groomers with foil shaving elements usually contain nickel. Prolonged contact exposure to nickel, such as wearing jewelry, body piercings and eye glass frames may cause a nickel allergic contact dermatitis (NACD). However, due to the short contact time and intended use of these and other hair removal products, there will not be enough nickel released or absorbed into the skin to cause a NACD.
The high-quality stainless-steel grade used within our other products contains none or a very limited percentage of nickel only and does not release enough nickel to cause a NACD or even a nickel allergy.
If you suffer from a severe nickel allergy, consult your doctor if it is safe for you to use this device.
The information on this page applies to the following models: BG3005/15, BG3006/15, HP6306/00, HP6341/00.
Crossed out tap symbol
If you see a crossed out tap symbol on the box or body of your groomer, it means that the groomer is not washable and should be cleaned without water.
Philips Groomer not washable
Tap symbol
A tap symbol printed on your grooming device indicates that it is washable and its parts (cutters and combs) can be cleaned with water. However, this does not mean that you can use it to clip or trim your hair in the shower or bath.
Philips Groomer washable
Bath or shower symbol
If you see a shower or bath symbol printed on your groomer, it means that your device is waterproof. It can be safely cleaned with water and used while taking a shower or a bath. For safety reasons, these waterproof groomers can only be used cordless and will not turn on if they are connected to the power supply.
Note: Please keep in mind that the symbols on your Philips Groomer vary per model type. If you are still unsure whether it is safe to clean your Philips Groomer with water then please contact us for further support.
Philips Groomer waterproof
The information on this page applies to the following models: MG5930/65, MG9551/65, MG7920/65, BT1230/18, BT1235/18, BT1234/18, BT1233/18, MG7707/15, BT3125/15, MG3710/65, MG7715/65, MG3721/65, BT3231/15, BT3241/15, BT3235/15, BT3102/25, BT1230/15, BT3101/25, BT1235/15, BT1234/16, BT1233/15, BT1232/15, BG3005/15, BT1232/18, MG5730/15, MG3721/77, MG3747/15, HC3505/15, NT3650/16, BT3101/15, BT3102/15, BT3105/15, BT1210/16, BT7501/15, BG3006/15, BT3203/85, BT3201/15, BT3227/15, BT3221/15, BT3215/15, BT3205/15, BT3203/15, MG7745/15, BT3216/13, MG3730/15, MG7715/15, BT3211/15, BT1212/15, BT1210/15, BT1215/15, BT1213/15, MG7715/13, MG3710/13, MG3730/13, MG3732/65, QT4003/15, QT4009/15, MG5740/15, NT1120/10, BT7206/15, QT4018/15, BT990/15, BT5200/15, BT1000/15, BT1005/10, NT1150/10, QT4006/15, BG1024/16, BG1025/15, BG105/11, BT3200/15, QG3382/15, QG3389/15, QG3347/15, QG3387/15, QT4001/15, QT4011/15, QT4000/15, QT4005/15, QT4019/15.
Charging indications
Most Philips Hair Clippers and Trimmers have charging indications and lights on them to indicate when your device needs to be charged and is fully charged. Depending on the device you own the charging indications may be displayed in many different ways, as shown in the image below.
Some grooming devices do not have any charging indication on them. In that case, check the product's charger to see if has a light on it. This light lights up when the charger is connected to the power supply. For these products, follow the advised charging time as instructed in the user manual.
Philips Groomer charging indications
Travel lock
Some grooming devices come with a travel lock functionality to prevent your groomer from turning on by accident while travelling.
To activate the travel lock press and hold the on/off button for 3 seconds. The lock symbol will flash briefly to indicate that the device is locked now. If you try to switch it on it will not work, rather the travel lock symbol will flash to remind you to deactivate it.
To deactivate the travel lock you can again press and hold the power button for 3 seconds. The symbol will again flash briefly and then the groomer will turn on.
Some devices have the travel lock feature without a visible indicator. Locking and unlocking these devices works similarly as those with a travel lock indicator. Hold the on/off button for 3 seconds to activate or deactivate the lock feature.
Philips Groomer travel lock
Turbo mode
Some Philips Hair Clippers and Multigroomers are equipped with a Turbo Mode. This is usually indicated with a T shaped symbol on the clipper. Press this button when you need extra power from your clipper. This can be useful when you are trimming very thick hair.
Philips Groomer Turbo Mode
Quiet mode
A device with a baby symbol can be used to activate the quiet mode. Quiet mode provides a gentler trimming experience for children. During trimming, you can start the quiet mode to lower the rotation speed of the trimmer for a quieter trim.
Philips Groomer Quiet Mode
Oil reminder
If you see the image of an oil drop flashing on your grooming device, this is a reminder for you to oil your groomer. You should regularly clean and oil your groomers with the oil provided in the package or sewing machine oil.
Depending on the grooming device you own, you may find other symbols printed or flashing on it. For more information regarding your exact model please refer to the user manual or contact us.
Watch the video below to see how to use our latest Philips Beard Trimmer Prestige with unique built-in comb. Keep in mind that depending on the model type, the features on the shaver will vary.
Philips Groomer oil reminder
Opening battery compartment
Some Philips groomers operate on disposable batteries. Before attempting to insert or replace the batteries for your groomer, make sure your hands and the device are dry.
The battery compartment is located in the handle. To replace the batteries, the battery compartment can easily be opened by aligning the indications of the symbols as instructed below.
1. To remove the battery compartment cover, turn it clockwise until the setting indicator (V) points to the 'unlocked' indication (Ʌ) (Fig. 4).
2. Pull the battery compartment cover off the handle (Fig. 5).
3. Put the battery in the battery compartment (Fig. 6). Make sure the + and - poles of the battery point in the right direction.
4. Slide the battery compartment cover back onto the handle (Fig. 7).
5. Turn the battery compartment cover counterclockwise until the setting indicator (V) points to the 'locked’ indication (I) (Fig. 8).
Philips Battery Compartment
Eject button
An eject logo or button indicates where to push to remove cutting elements or attachments. Carefully push the eject symbol while slowly pulling the cutting element or attachment off the device.
Groomer Eject Button
The information on this page applies to the following models: MG5930/65, MG9551/65, MG7920/65, BT1230/18, BT1235/18, BT1234/18, BT1233/18, MG3750/33, MG7707/15, BT3125/15, MG3710/65, MG7715/65, MG3721/65, BT3231/15, BT3241/15, BT3235/15, BT1230/15, BT1235/15, BT1234/16, BT1233/15, BT1232/15, BG3005/15, BT1232/18, MG5730/15, MG3721/77, MG3747/15, HC3505/15, BT3101/15, BT1210/16, BT7501/15, BG3006/15, BT3201/15, BT3227/15, BT3221/15, BT3215/15, BT3205/15, BT3203/15, MG7745/15, BT3216/13, MG3730/15, MG7715/15, BT3211/15, BT1212/15, BT1210/15, BT1215/15, BT1213/15, MG7715/13, MG3710/13, MG3730/13, MG3732/65, QT3315/10, QT4009/15, QT4003/15, MG5740/15, QT3310/15, QT4018/15, QT4006/15, BG1024/16, BG1025/15, BG105/11, QT4001/15, QT4011/15, QT4000/15, BT9280/15, QG3320/15, QT4005/15, QT4019/15.
Showerproof and washable devices
Waterproof trimmers and clippers can be safely used and cleaned with water. However, these devices will not work when they are plugged into an electric socket. They are designed this way to prevent any kind of accidents.
To find out if your groomer is showerproof look for the following symbol, printed on the body of your device.
Philips waterproof groomers
Non-washable devices
Some Philips Groomers are only meant for dry use. This means you cannot use them or clean them with water. These types of devices can be used while they are plugged in to an electric socket.
To check if your device is non-washable look for the following symbol printed on it.
Philips non-washable groomers
Washable devices
Some Philips Groomers suitable for dry use can still be cleaned with water. These can be used while they are connected to the power outlet. However, while cleaning them with water make sure you unplug them first.
These type of washable devices have the following symbol printed on them.
If you are still unsure about the usage of your grooming device, then please consult your user manual for further details or contact us.
Philips washable groomers
The information on this page applies to the following models: MG5930/65, MG9551/65, MG7920/65, BT1230/18, BT1235/18, BT1234/18, BT1233/18, MG3750/33, MG7707/15, BT3125/15, MG3710/65, MG7715/65, MG3721/65, BT3231/15, BT3241/15, BT3235/15, BT3102/25, BT1230/15, BT3101/25, BT1235/15, BT1234/16, BT1233/15, BT1232/15, BG3005/15, BT1232/18, MG5730/15, MG3721/77, MG3747/15, HC3505/15, BT3101/15, BT3102/15, BT3105/15, BT1210/16, BT7501/15, BG3006/15, BT3203/85, BT3201/15, BT3227/15, BT3221/15, BT3215/15, BT3205/15, BT3203/15, MG7745/15, BT3216/13, MG3730/15, MG7715/15, BT3211/15, BT1212/15, BT1210/15, BT1215/15, BT1213/15, MG7715/13, MG3710/13, MG3730/13, MG3732/65, QT3315/10, QT4009/15, QT4003/15, MG5740/15, QT3310/15, BT7206/15, QT4018/15, BT990/15, BT5200/15, BT1000/15, BT1005/10, QT4006/15, BG1024/16, BG1025/15, BG105/11, BT3200/15, QG3382/15, QG3389/15, QG3347/15, QG3387/15, QT4001/15, QT4011/15, QT4000/15, HC3420/15, HC5450/15, BT9280/15, QG3383/15, QG3383/16, QG3333/15, QG3343/16, QG3320/15, BG2024/15, QT4005/15, QT4019/15. How do I clean my Philips Groomer?
Charging indications
Most Philips Hair Clippers and Trimmers have charging indications and lights on them to indicate when your device needs to be charged and is fully charged. Depending on the device you own the charging indications may be displayed in many different ways, as shown in the image below.
Some grooming devices do not have any charging indication on them. In that case, check the product's charger to see if has a light on it. This light lights up when the charger is connected to the power supply. For these products, follow the advised charging time as instructed in the user manual.
Philips Groomer charging indications
Travel lock
Some grooming devices come with a travel lock functionality to prevent your groomer from turning on by accident while travelling.
To activate the travel lock press and hold the on/off button for 3 seconds. The lock symbol will flash briefly to indicate that the device is locked now. If you try to switch it on it will not work, rather the travel lock symbol will flash to remind you to deactivate it.
To deactivate the travel lock you can again press and hold the power button for 3 seconds. The symbol will again flash briefly and then the groomer will turn on.
Some devices have the travel lock feature without a visible indicator. Locking and unlocking these devices works similarly as those with a travel lock indicator. Hold the on/off button for 3 seconds to activate or deactivate the lock feature.
Philips Groomer travel lock
Turbo mode
Some Philips Hair Clippers and Multigroomers are equipped with a Turbo Mode. This is usually indicated with a T shaped symbol on the clipper. Press this button when you need extra power from your clipper. This can be useful when you are trimming very thick hair.
Philips Groomer Turbo Mode
Quiet mode
A device with a baby symbol can be used to activate the quiet mode. Quiet mode provides a gentler trimming experience for children. During trimming, you can start the quiet mode to lower the rotation speed of the trimmer for a quieter trim.
Philips Groomer Quiet Mode
Oil reminder
If you see the image of an oil drop flashing on your grooming device, this is a reminder for you to oil your groomer. You should regularly clean and oil your groomers with the oil provided in the package or sewing machine oil.
Depending on the grooming device you own, you may find other symbols printed or flashing on it. For more information regarding your exact model please refer to the user manual or contact us.
Watch the video below to see how to use our latest Philips Beard Trimmer Prestige with unique built-in comb. Keep in mind that depending on the model type, the features on the shaver will vary.
Philips Groomer oil reminder
Opening battery compartment
Some Philips groomers operate on disposable batteries. Before attempting to insert or replace the batteries for your groomer, make sure your hands and the device are dry.
The battery compartment is located in the handle. To replace the batteries, the battery compartment can easily be opened by aligning the indications of the symbols as instructed below.
1. To remove the battery compartment cover, turn it clockwise until the setting indicator (V) points to the 'unlocked' indication (Ʌ) (Fig. 4).
2. Pull the battery compartment cover off the handle (Fig. 5).
3. Put the battery in the battery compartment (Fig. 6). Make sure the + and - poles of the battery point in the right direction.
4. Slide the battery compartment cover back onto the handle (Fig. 7).
5. Turn the battery compartment cover counterclockwise until the setting indicator (V) points to the 'locked’ indication (I) (Fig. 8).
Philips Battery Compartment
Eject button
An eject logo or button indicates where to push to remove cutting elements or attachments. Carefully push the eject symbol while slowly pulling the cutting element or attachment off the device.
Groomer Eject Button
The information on this page applies to the following models: MG5930/65, MG9551/65, MG7920/65, BT1230/18, BT1235/18, BT1234/18, BT1233/18, MG3750/33, MG7707/15, BT3125/15, MG3710/65, MG7715/65, MG3721/65, BT3231/15, BT3241/15, BT3235/15, BT1230/15, BT1235/15, BT1234/16, BT1233/15, BT1232/15, BG3005/15, BT1232/18, MG5730/15, MG3721/77, MG3747/15, HC3505/15, BT3101/15, BT1210/16, BT7501/15, BG3006/15, BT3201/15, BT3227/15, BT3221/15, BT3215/15, BT3205/15, BT3203/15, MG7745/15, BT3216/13, MG3730/15, MG7715/15, BT3211/15, BT1212/15, BT1210/15, BT1215/15, BT1213/15, MG7715/13, MG3710/13, MG3730/13, MG3732/65, QT3315/10, QT4009/15, QT4003/15, MG5740/15, QT3310/15, QT4018/15, QT4006/15, BG1024/16, BG1025/15, BG105/11, QT4001/15, QT4011/15, QT4000/15, BT9280/15, QG3320/15, QT4005/15, QT4019/15.
Showerproof and washable devices
Waterproof trimmers and clippers can be safely used and cleaned with water. However, these devices will not work when they are plugged into an electric socket. They are designed this way to prevent any kind of accidents.
To find out if your groomer is showerproof look for the following symbol, printed on the body of your device.
Philips waterproof groomers
Non-washable devices
Some Philips Groomers are only meant for dry use. This means you cannot use them or clean them with water. These types of devices can be used while they are plugged in to an electric socket.
To check if your device is non-washable look for the following symbol printed on it.
Philips non-washable groomers
Washable devices
Some Philips Groomers suitable for dry use can still be cleaned with water. These can be used while they are connected to the power outlet. However, while cleaning them with water make sure you unplug them first.
These type of washable devices have the following symbol printed on them.
If you are still unsure about the usage of your grooming device, then please consult your user manual for further details or contact us.
Philips washable groomers
The information on this page applies to the following models: MG5930/65, MG9551/65, MG7920/65, BT1230/18, BT1235/18, BT1234/18, BT1233/18, MG3750/33, MG7707/15, BT3125/15, MG3710/65, MG7715/65, MG3721/65, BT3231/15, BT3241/15, BT3235/15, BT3102/25, BT1230/15, BT3101/25, BT1235/15, BT1234/16, BT1233/15, BT1232/15, BG3005/15, BT1232/18, MG5730/15, MG3721/77, MG3747/15, HC3505/15, BT3101/15, BT3102/15, BT3105/15, BT1210/16, BT7501/15, BG3006/15, BT3203/85, BT3201/15, BT3227/15, BT3221/15, BT3215/15, BT3205/15, BT3203/15, MG7745/15, BT3216/13, MG3730/15, MG7715/15, BT3211/15, BT1212/15, BT1210/15, BT1215/15, BT1213/15, MG7715/13, MG3710/13, MG3730/13, MG3732/65, QT3315/10, QT4009/15, QT4003/15, MG5740/15, QT3310/15, BT7206/15, QT4018/15, BT990/15, BT5200/15, BT1000/15, BT1005/10, QT4006/15, BG1024/16, BG1025/15, BG105/11, BT3200/15, QG3382/15, QG3389/15, QG3347/15, QG3387/15, QT4001/15, QT4011/15, QT4000/15, HC3420/15, HC5450/15, BT9280/15, QG3383/15, QG3383/16, QG3333/15, QG3343/16, QG3320/15, BG2024/15, QT4005/15, QT4019/15.
See the following instructions on how to clean your Philips Groomer below.
Washable groomers
Washable groomers have a water tap printed on the back of the handle or located in the user manual. Washable groomers with a water tap can be cleaned with water, however this does not mean that you can use it to clip or trim your hair in the shower or bath. To clean these devices, take off the attachments and cutter and clean the area underneath it with water. Do not use soapy water or any cleaning detergents, as this can remove the protective grease on the cutter and effect its performance. Wash and dry the attachments separately before reattaching them to the groomer. Never immerse the appliance in water.
Washable groomers
Showerproof groomers
Showerproof groomers have a shower/bath symbol and can be safely cleaned with water and used while taking a shower or bath. For safety reasons, these waterproof groomers can only be used cordless and will not turn on if they are connected to the power supply.
Before cleaning, ensure the power is off and the appliance is disconnected from the wall socket. To clean these devices, take off any comb and the cutting unit of the device. Clean the comb and cutting unit under a warm tap. Shake off excess water and allow the parts to air dry completely. Never dry the cutting unit with a towel or tissue as this may cause damage.
Do not use soapy water or any cleaning detergents, as this can remove the protective grease on the cutter and effect its performance.
For more detailed instructions of your model, please refer to the user manual.
Showerproof groomers
Non-washable groomers
These groomers have a crossed-out tap symbol (Image 1) located in the user manual or printed on the back of the handle. These appliances cannot be washed with water. Before cleaning, ensure the power is off and the appliance is disconnected from the wall socket. Remove the grooming comb and the cutting unit off the appliance. Clean the cutting unit and the inside of the appliance with the cleaning brush provided or a cotton bud.
For more detailed instructions of your model, refer to the user manual.
Non-washable groomers
Oiling your groomer after cleaning
We recommend oiling your groomer regularly. You can apply a few drops of oil on the teeth of the cutting element of your groomer. You can use the oil provided in the packaging or any other sewing machine oil.
If the groomer you own has an oil reminder (Image 2), an image of an oil drop will light up as a reminder for you to oil your groomer after it has been properly cleaned.
Oil your groomers with the oil provided in the package or sewing machine oil.
For more detailed instructions of your model refer to the user manual.
Oil groomer
The information on this page applies to the following models: MG5930/65, MG9551/65, MG7920/65, BT1230/18, BT1235/18, BT1234/18, BT1233/18, MG7707/15, BT3125/15, BT3231/15, BT3241/15, BT3235/15, BT3102/25, BT1230/15, BT3101/25, BT1235/15, BT1234/16, BT1233/15, BT1232/15, BG3005/15, BT1232/18, MG5730/15, MG3721/77, MG3747/15, HC3505/15, BT3101/15, BT3102/15, BT3105/15, BT1210/16, BT7501/15, BG3006/15, BT3203/85, BT3201/15, BT3227/15, BT3221/15, BT3215/15, BT3205/15, BT3203/15, MG7745/15, BT3216/13, MG3730/15, MG7715/15, BT3211/15, BT1212/15, BT1210/15, BT1215/15, BT1213/15, MG7715/13, MG3710/13, MG3730/13, MG3732/65, QT3315/10, QT4009/15, QT4003/15, MG5740/15, QT3310/15, BT7206/15, QT4018/15, BT1000/15, BT1005/10, QT4006/15, BG1024/16, BG1025/15, BG105/11, BT3200/15, QG3382/15, QG3389/15, QG3347/15, QG3387/15, QT4001/15, QT4011/15, QT4000/15, HC3420/15, HC5450/15, BT9280/15, QG3383/15, QG3383/16, QG3333/15, QG3343/16, QG3320/15, QT4005/15, QT4019/15.
You can use the model number to register your Philips product or find product-specific information. Meanwhile, the serial number identifies when Philips produced your product.
Tip: there are often different versions of the same model, with additional features or accessories included with each. You can identify your version using the two digits that come after a slash at the end of the model number. The additional digits are not printed on the product itself but you can find them on the packaging or on the payment receipt.
Back of the device
For grooming devices such as OneBlade, beard trimmers and hair clippers, you will find the model and serial numbers located on the back of the handle. The model number usually begins with two letters followed by four numbers, e.g. QP2540.
The serial number, meanwhile, is in a YYWW (year and week) format.
Model and Serial number Philips Groomer
Top of the device
Some hair clippers and beard trimmers have the model number located on the top of the device, just below the cutting teeth.
The serial number is usually located under the cutting unit. Try gently removing the upper part of your groomer or clipper. The serial number should be visible there in a YYWW (year and week) format.
Model and Serial number Philips Groomer
Inside the handle
For products that use on replaceable AA batteries, the model and serial number is located inside the battery compartment.
Open the battery compartment using the instructions provided in the user manual. The model and serial number will be visible inside the compartment.
Model and Serial number Philips Nose Trimmer
The information on this page applies to the following models: MG5930/65, MG9551/65, MG7920/65, QP1624/10, BT1230/18, BT1235/18, BT1234/18, BT1233/18, QP1424/10, MG3750/33, MG7707/15, BT3125/15, MG3721/65, MG3710/65, MG7715/65, BT3231/15, BT3241/15, BT3235/15, BT1230/15, BT1234/16, BT1233/15, BT1235/15, BT1232/15, BG3005/15, BT1232/18, MG5730/15, MG3721/77, MG3747/15, HC3505/15, NT3650/16, BT3101/15, BT3105/15, BT3102/15, BT1210/16, BT7501/15, BG3006/15, BT3201/15, BT3227/15, BT3221/15, BT3215/15, BT3205/15, BT3203/15, MG7745/15, BT3216/13, MG7715/15, MG3730/15, BT3211/15, BT1212/15, BT1210/15, BT1215/15, BT1213/15, MG7715/13, MG3710/13, MG3730/13, MG3732/65, QT4003/15, QT3315/10, QT4009/15, MG5740/15, NT1120/10, QT3310/15, QT4018/15, NT1150/10, QT4006/15, BG1024/16, BG1025/15, BG105/11, QT4001/15, QT4011/15, QT4000/15, BT9280/15, QG3320/15, QT4005/15, QT4019/15.