This e-Shop is operated by Analemma Commerce
Priority Customer Care – 18001022929
Seller: Analemma Commerce Pvt. Ltd.
Additional Information:
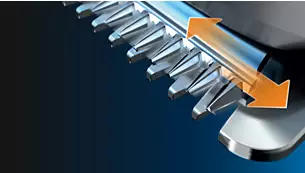
The self-sharpening steel blades on this trimmer for face and body are reinforced with iron and tempered for maximum strength. This results in blades that stay as sharp as day 1. No rusting. No blade oil needed.
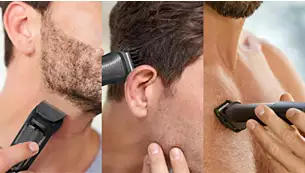
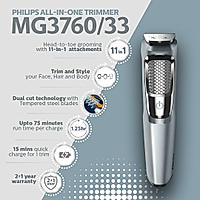
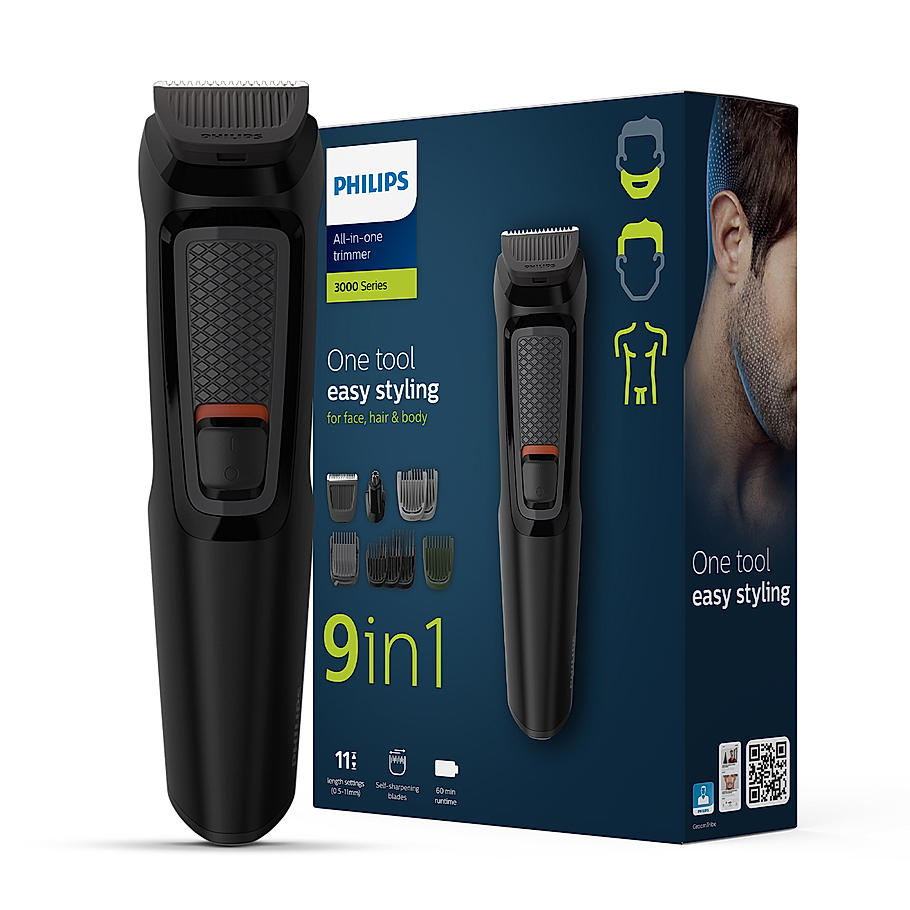
This all-in-one trimmer conveniently trims and styles your facial hair, clips your hair and grooms your body.
Use the trimmer without a comb to get clean, sharp lines around the edges of your beard and neck. The trimmer's shelf-sharpening blades remain as sharp as day 1, even after 3 years of use.
Avoid nicks and cuts, as the all-in-one trimmer quickly removes unwanted nose and ear hair.
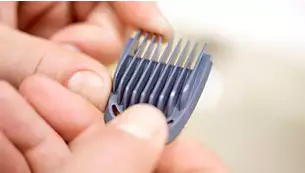
Quickly touch up your face and hair with the seven reinforced cutting guards. 2 stubble combs for 1mm and 2mm trimming, an adjustable beard comb, 3 hair combs at 9mm, 12mm and 16mm, and 1 body comb.
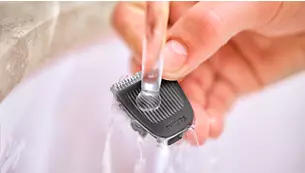
Your face and body trimmer is simple to maintain, with non-corrosive blades and water-resistant guards for easy cleaning.
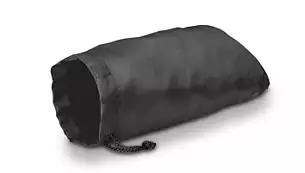
Declutter your bathroom and gym bag, and keep all your attachments in one place, with the small storage pouch for easy organization and travel.
All of our grooming products are built to last. They come with a 2 year warranty, never need to be oiled and are compatible with any voltage worldwide.
Get up to 70 minutes of cordless use for every 16-hour charge.
5 reviews
0%recommend this product
Create The Look You Want
Cutting System
Accessories
Ease Of Use
Service
Power
Published on 04 January 2023
You can rinse your Philips Groomer or Trimmer only if it is waterproof. You can check that by looking at the signs and symbols printed on your groomer's box or handle.
Crossed out tap symbolIf you see a crossed out tap symbol on the box or body of your groomer, it means that the groomer is not washable and should be cleaned without water.
Tap symbol
A tap symbol printed on your grooming device indicates that it is washable and its parts (cutters and combs) can be cleaned with water. However, this does not mean that you can use it to clip or trim your hair in the shower or bath.
Bath or shower symbol
If you see a shower or bath symbol printed on your groomer, it means that your device is waterproof. It can be safely cleaned with water and used while taking a shower or a bath. For safety reasons, these waterproof groomers can only be used cordless and will not turn on if they are connected to the power supply.
Note: Please keep in mind that the symbols on your Philips Groomer vary per model type. If you are still unsure whether it is safe to clean your Philips Groomer with water then please contact us for further support.
If you are wondering whether you can use your Philips Male Grooming device corded, read our advice below.
Showerproof and washable devices
Waterproof trimmers and clippers can be safely used and cleaned with water. However, these devices will not work when they are plugged into an electric socket. They are designed this way to prevent any kind of accidents.
To find out if your groomer is showerproof look for the following symbol, printed on the body of your device.
Non-washable devices
Some Philips Groomers are only meant for dry use. This means you cannot use them or clean them with water. These types of devices can be used while they are plugged in to an electric socket. To check if your device is non-washable look for the following symbol printed on it.
Washable devices
Some Philips Groomers suitable for dry use can still be cleaned with water. These can be used while they are connected to the power outlet. However, while cleaning them with water make sure you unplug them first.
These type of washable devices have the following symbol printed on them.
If you are still unsure about the usage of your grooming device, then please consult your user manual for further details or contact us.
Published on 06 January 2023
If you are wondering, what do the lights and symbols on your Philips Male Grooming device mean, then please read our answer below.
Charging indications
Most Philips Hair Clippers and Trimmers have charging indications and lights on them to indicate when your device needs to be charged and is fully charged. Depending on the device you own the charging indications may be displayed in many different ways, as shown in the image below.
Some grooming devices do not have any charging indication on them. In that case, check the product's charger to see if has a light on it. This light lights up when the charger is connected to the power supply. For these products, follow the advised charging time as instructed in the user manual.
Travel lock
Some grooming devices come with a travel lock functionality to prevent your groomer from turning on by accident while travelling.
To activate the travel lock press and hold the on/off button for 3 seconds. The lock symbol will flash briefly to indicate that the device is locked now. If you try to switch it on it will not work, rather the travel lock symbol will flash to remind you to deactivate it.
To deactivate the travel lock you can again press and hold the power button for 3 seconds. The symbol will again flash briefly and then the groomer will turn on.
Some devices have the travel lock feature without a visible indicator. Locking and unlocking these devices works similarly as those with a travel lock indicator. Hold the on/off button for 3 seconds to activate or deactivate the lock feature.
Turbo mode
Some Philips Hair Clippers and Multiroom are equipped with a Turbo Mode. This is usually indicated with a T shaped symbol on the clipper. Press this button when you need extra power from your clipper. This can be useful when you are trimming very thick hair.
Quiet mode
A device with a baby symbol can be used to activate the quiet mode. Quiet mode provides a gentler trimming experience for children. During trimming, you can start the quiet mode to lower the rotation speed of the trimmer for a quieter trim.
Oil reminder
If you see the image of an oil drop flashing on your grooming device, this is a reminder for you to oil your groomer. You should regularly clean and oil your groomers with the oil provided in the package or sewing machine oil.
Depending on the grooming device you own, you may find other symbols printed or flashing on it. For more information regarding your exact model please refer to the user manual or contact us.
Watch the video below to see how to use our latest Philips Beard Trimmer Prestige with unique built-in comb. Keep in mind that depending on the model type, the features on the shaver will vary.
Opening battery compartment
Some Philips groomers operate on disposable batteries. Before attempting to insert or replace the batteries for your groomer, make sure your hands and the device are dry.
The battery compartment is located in the handle. To replace the batteries, the battery compartment can easily be opened by aligning the indications of the symbols as instructed below.
Eject button
An eject logo or button indicates where to push to remove cutting elements or attachments. Carefully push the eject symbol while slowly pulling the cutting element or attachment off the device.
A beard can be a thing of beauty. Keep yours in line with our ultimate beard trimming guide, packed with tips.
What does beard trimming involve?
If you follow the proper way to trim a beard, you’ll be aiming for an even length all over, and a proper beard neckline, cheekline, mustache and lipline. Here’s how to achieve that.
Step 1: The all-over beard trim
Wash and dry your beard and face. If your beard trimmer or multigroomer comes with multiple click-on beard combs, you can use these to get the desired hair length. The numbers on the combs indicate the length of the remaining hair after trimming. Simply click-on the appropriate comb onto the appliance and start trimming. If your appliance comes with an adjustable comb, set the right setting first.
If your product comes with a click-on skin protect comb, this can help you protect your skin while creating a close trim. The skin protect comb is designed to give you a comfortable, clean look while providing complete skin protection. The comb guides the skin away from the blades for a close, smooth trim.
But when you trim for the first time, you may start by using the comb with the maximum trimming length setting or the highest length setting to familiarize yourself with the product first.
Go against the direction of hair growth to remove excess bulk. Repeat using shorter trim settings until you’re happy with the length.
Step 2: Define your neckline
For the perfect beard neckline, put a finger horizontally just above your Adam’s Apple and trim a vertical strip below this line. Work outwards under your jawline to one side, then return to the center and work your way to the other side. You’re only excused this step if you prefer to have stubble. If you are trimming a full beard, the neckline matters. Struggling? Our beard neckline guide here can give you more details.
Step 3: Follow your beard trim through with a shave
Shave off the trimmed hairs located below your new beard neckline. You can remove these hairs by using a Philips electric shaver, trimmer without a comb or a manual blade. If your product comes with a click-on skin protect comb, this can help you protect your skin while creating a close trim. When using the trimmer or skin protect comb, place the flat side of the cutting element against your skin and make strokes against the direction of hair growth to trim hair close to the skin.
Step 4: Choose your cheekline
If you’re happy with a natural beard cheekline, leave it as it is. For an edgier, crisper look, go for a straight or slightly rounded line to the bottom of your sideburns. You can shape your cheekline by holding the cutting element perpendicular to the skin and move it upwards or downwards with gentle pressure. The lower your cheekline, the more length you’ll give to your face.Get tips on cheekline shaping here. .
Step 5: Shape up your mustache
You can trim your mustache to the same length as your beard, or leave it slightly longer to make it stand out more. For a nice, clean lipline, close your mouth and smile. Keep your mustache clean and trim the bottom (without the trimmer comb) to create a 1 mm clear line above your lips (optional).
Different countries may use different voltages in their electrical devices. Not using compatible voltage can damage of your device.
Always check if your product’s adapter is suitable for certain voltages, by checking the specifications of Philips adapter provided with your product.
Our adapters have automatic voltage selection and will show 100 to 240 volts printed on the adapter. This means the adapter is suitable for mains voltages ranging from 100 to 240 volts.
Plug
Even if two countries operate on the same voltage or your adapter is suitable for the voltage used, plugs abroad can have different shapes. Check the type of plug of the country you are visiting. For example, the rectangular US plug does not fit the round shaped European receptacle. A travel adapter will allow you only to plug your appliance into another type of outlet.
Note: Our shavers with build-in revolving pins like: PQ182 and PQ190 are only suitable for mains voltages of 220V.