This e-Shop is operated by Analemma Commerce
This e-Shop is operated by Analemma Commerce
Priority Customer Care – 18001022929
4.8 4 reviews / Write a review
Seller: Analemma Commerce Pvt. Ltd.
This item is currently out of stock
Additional Information:
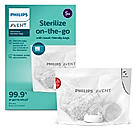
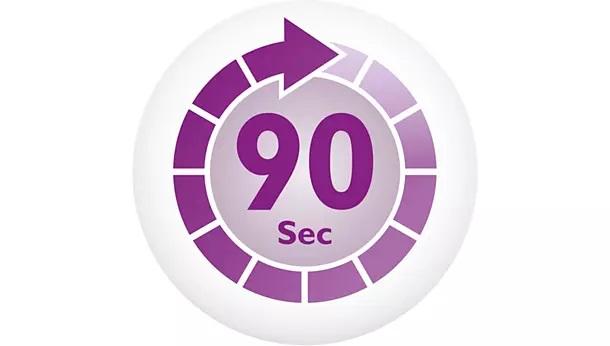
Each reusable microwave steam sterilizing bag can be used to sterilize bottles, breast pumps and other baby products in just 90 seconds*

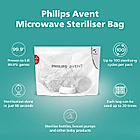
Each microwave steam sterilizer bag is proven to kill 99.9% of germs and bacteria.
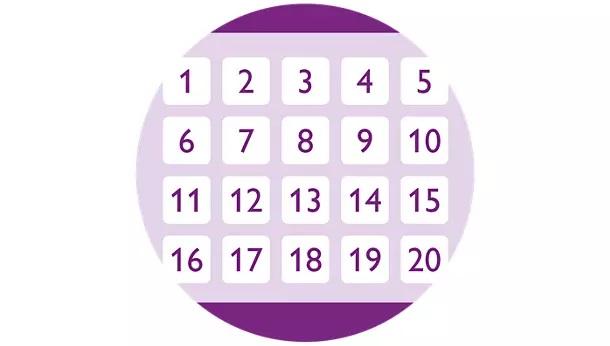
Each bag includes a check box. By ticking the check box you can quickly and easily keep track of the number of times each bag has been used.
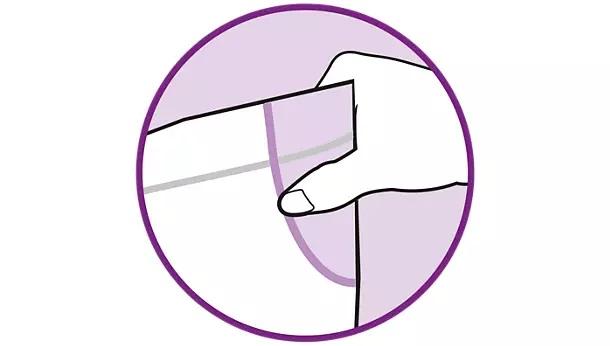
Each bag has a Safe handling zone. This is a marked area on the bag where it can be picked up safely straight from the microwave.

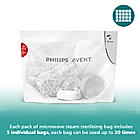
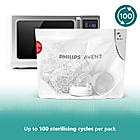
Each pack of microwave steam sterilizing bags includes five individual bags, and each bag can be used up to 20 times. This means that you will be able to sterilize baby bottles, breast pumps and other accessories up to 100 times in just one retail pack.
4 reviews
0%recommend this product

Development Stages
Design Specifications
Weight And Dimensions
What Is Included
Kills 99.9% of germs & bacteria
SCF291-00
3,999 4,995
SCF430-01
1,999 2,195
Just Launched
SCF064-01
345
Just Launched
SCF061-01
295
New
SCF430-10
2,588 3,045
Just Launched
SCY095-01
195
Just Launched
SCY098-01
195
Just Launched
Just Launched
Just Launched
Just Launched
Just Launched
Just Launched
SCY762-02
319
Just Launched
SCY763-02
319
Just Launched
SCY764-02
319
Just Launched
Just Launched
SCY963-02
425
Just Launched
SCY964-02
425
Just Launched
SCY965-02
425

Perfect Valentine’s Day Gift for Him & Her to Stay Stylish Every Day Valentine’s Day is the perfect occasion to show your loved ones how much you care. This year, go beyond chocolates and flowers and choose stylish gifts for him and her for that touch of confidence. Whether it’s hair styling tools for her or grooming essentials for him, these Valentine’s Day gift ideas will bring a smile to their faces while elevating their style game. Perfect Valentine’s Day Gift for Her Our busy schedules do not allow the time for the inner artist in you to draft a handwritten letter and her portrait. That is why we recommend these Valentine's Day gifts for her that are useful, convenient and eligible for online shopping. If She Loves to Style Her Hair Introduce her to Philips BHS522 NourishCare Hair Straightener, India’s first hair straightener designed for no heat damage. This styling tool features: NourishCare Technology: Forms a protective layer on the hair, preventing water loss caused by heat. SilkProtectCare and Serum: Acts as a built-in heat protectant, releasing serum while styling for smooth, nourished hair. No Pre-Treatment Required: Skip the heat protectant sprays—this straightener has you covered. With its advanced technology, she can achieve salon-like results without worrying about hair damage. If She Loves to Style Her Hair But is Always on the Run The Philips BHH730 Hair Straightening Brush is perfect for quick and effortless styling. Key features include: Keratin-Infused Ceramic Coating: Leaves hair naturally shiny. Triple Bristle Design: Detangles, straightens, and protects hair in one go. Thermoprotect Care: Prevents overheating and minimizes heat damage. Swivel Cord: Ensures easy and comfortable use. It's the ideal gift for women who want sleek, straight hair in just 5 minutes. If She Loves Fragrant Things Delight her senses with a luxurious perfume or scented candles. Choose a fragrance that resonates with her personality-floral, fruity, or musky. If She Has a Sweet Tooth Gift her favourite chocolates or cake or if you want to top it off, gift her membership discounts to her favourite dessert shop. Pair it with a heartfelt note for a sweeter touch. If She Loves a Cozy Date Night Surprise her with a plush throw blanket, a set of romantic movie DVDs, and a bottle of her favourite wine. This thoughtful gift is perfect for an intimate evening at home. Perfect Valentine’s Day Gift for Him We also have recommendations for perfect Valentine's Day gifts for him, no matter if he is a corporate climber, nature lover, musician, wannabe chef or artist. If He Loves to Travel A stylish weekender bag or a compact travel grooming kit will keep him organized and ready for adventures. If He Has a Thing for Vintage, Retro Music Gift him a record player or a curated collection of vinyl records. Add his favourite classic tunes for a nostalgic touch. If He Is Particular About His Looks The Philips MG9551 All-in-One Men's Trimmer is a professional grooming tool designed for precision and versatility: 15-in-1 Attachments: Trim face, body, and even sensitive regions. Twin Trim Blades: Offers a professional finish. BeardSense Technology: Adapts to beard density for consistent trimming. 120-Minute Runtime: With a 5-minute quick charge for emergencies. Precision Trimming Comb: Perfect for styling facial hair. Its all-metal premium body and advanced features make it a must-have for every man who takes grooming seriously. If His Beard Feels a Little Scruffy Upgrade his grooming routine with the Philips QP2724 OneBlade Hybrid Trimmer and Razor: Trim, Edge, and Shave: All-in-one tool for versatile styling. Patented Dual Protection Technology: Ensures no nicks, cuts, or skin irritation. Powerful Motor: Provides a seamless zero-trim in one stroke. Flexible Usage: Works with shaving foam, gel, or dry use even in the shower. Longer Battery Life: Perfect for on-the-go grooming. This tool combines functionality with comfort, making it the ultimate gift for a well-maintained beard. If He Loves to Cook Surprise him with a high-quality chef's knife, a personalized apron, or a set of exotic spices. These gifts will elevate his time in the kitchen. Impress Your Valentine With Philips Styling & Grooming Tools This Valentine’s Day, give your loved ones the gift of style and self-care with thoughtful, high-quality presents. From the Philips NourishCare Hair Straightener for her to the Philips All-in-One Trimmer or OneBlade for him, these gift ideas for couples will help them look and feel their best every day. Celebrate love with stylish gifts for him and her and conclude Valentine’s Day 2025 on a sweeter note. .p-heading-02 { letter-spacing: -.5px; font-size: 21px; line-height: 40px; color: #050505; font-weight: 700; margin-bottom: 24px; } .p-heading-03 { letter-spacing: -.2px; font-size: 21px; line-height: 26px; color: #050505; font-weight: 700; margin-bottom: 13px; } .p-heading-01 { letter-spacing: -1px; font-size: 32px; line-height: 50px; color: #050505; font-weight: 700; margin-bottom: 21px; } Discover beauty Whether you're looking for haircare or hair removal, Philips has the right beauty tools and tips for you. View all Read all articles >
Read More
Facebook Twitter Email Pinterest Reading Time: 4 Min Table of Contents Beard Grooming Tips for 2025: Tips and Tools to Get Started Why Grooming Matters in 2025? What Should Be in Your Beard Grooming Kit? How Do I Choose My Beard Style? Stylish Beard Trends in 2025 Beard Grooming Tips for Men to Take into 2025 Make 2025 the Year of Perfect Beard Grooming with Philips Beard Grooming Tips for 2025: Tips and Tools to Get Started As we step into 2025, it’s time to refresh our grooming routines and set new standards for self-care. For men who like to keep a stylish beard, grooming is more than a trend; it is a game changer. Whether you just hit puberty and want some beard grooming tips or a young seasoned grooming pro, these grooming resolutions and tips will help you be in trend and look more confident than ever in your signature beard. Why Grooming Matters in 2025? We are walking into a space where personal presentation matters a lot. Grooming goes just beyond aesthetics. A well-groomed beard means that you prioritise self-care, discipline and routine. Virtual meetings, social gatherings, or office presentations - your face and beard are the first things people notice. Hence, it is important to have a grooming routine. In this article, we first discuss beard grooming tips and recommendations for some of the best beard grooming products for 2025. What Should Be in Your Beard Grooming Kit? A proper grooming kit is essential to maintain a clean, trendy and healthy beard. A proper beard grooming kit includes the following beard grooming tools: Beard Wash: It is a gentle cleanser designed specifically for facial hair. Beard Oil: Beard oil helps to keep the beard soft and itch-free. Beard Balm/Butter: Beard oil is enough but for an extra touch of style, you can use beard balm or butter. You can style using butter and it adds an added layer of moisture. Beard Brush/Comb: A beard comb helps detangle fine or uneven beard hair. Scissors or Trimmer: For precise trimming and shaping, use scissors or even better, a beard trimmer. Quality Razor: Use a good quality razor for cleaning up edges and defining beard lines. Moisturiser: End your grooming routine with a gentle moisturizer to nourish your skin. We recommend our Philips Electric Shaver 5000 series (S5885 model). It is a perfect grooming tool for a close shave. The advanced SkinIQ technology senses and adapts according to your facial structure for a precise shave. The 360-D flexing heads follow your face cuts and bone structure to prevent any harsh nicks and cuts. Just charge it for 5 minutes and you can use it for both wet and dry shaves for 60 minutes. Try it out and you might consider it one of the best beard grooming tools of 2025. How Do I Choose My Beard Style? Your face shape, personal colour and style preferences and daily grooming routine can help to determine what beard style would suit your face. Here are some beard styles recommended for different facial structures: Oval Faces: Most styles work well, but a balanced beard length enhances symmetry. Square Faces: Go for styles that soften strong jawlines, like rounded or mid-length beards. Round Faces: Styles with sharper lines or longer lengths add definition. Oblong Faces: Shorter styles, like stubble or cropped beards, work best. Stylish Beard Trends in 2025 This year’s top beard styles balance classic trends with modern twists: The Full Lumberjack Beard Thick, bushy, and rugged. This style pairs well with a bold, confident personality. The Corporate Beard Clean, neatly trimmed, and professional. Ideal for those balancing business with style. The Fade Beard A modern style featuring a gradient effect from the cheeks to the jawline, perfect for trendsetters. The Stubble Short, low-maintenance, and timeless. Stubble works for almost any occasion. The Beardstache A unique blend of a moustache and short beard. This style is bold yet sophisticated. Beard Grooming Tips for Men to Take into 2025? This year, we are prioritising self-care above all. First things first, consistency is key to a well-groomed beard. Follow these steps to take your beard grooming resolutions to the next step. Create a Beard Care Routine Beard grooming is more than just a shave or trim. First, you need to have a beard grooming routine. Step 1: Cleansing Routine Wash Regularly: Use a beard wash to cleanse and hydrate without stripping natural oils. Rinse Thoroughly: Ensure no product residue remains. Step 2: How to Get the Perfect Shave? Before you shave, the beard should be soft and ideally your pores should be open. Wash your face with lukewarm water. Shave with a quality razor. A clean and sharp razor gives you precision. If they have skin-friendly blades, it also reduces the risk of any skin infection or irritation. We recommend trying Philips OneBlade. It's like a hybrid trimmer and shaver. It features Patented Dual Protection Technology, which prevents nicks and cuts. Its dual-sided blade follows your skin's contours, allowing you to define clean edges. Always shave along the direction of your hair growth. Use an alcohol-free aftershave or moisturizing balm to calm your skin and prevent any redness after shaving. Step 3: Simple Skincare Even men need a good skincare routine. You do need to go extensive and use different ingredients on your skin. Start simple. Use a gentle scrub to remove dead skin cells, followed by a face wash. Keep your skin hydrated with a moisturiser and sunscreen to shield it from sun rays. Step 4: Beard Care Wash Your Beard: Twice a week to remove buildup and impurities. Apply Beard Oil: Hydrates hair and skin, leaving your beard soft and manageable. Add Some Beard Butter to the Recipe: For styling and added hydration. Brush and Trim: Use a comb or brush to detangle and a trimmer for precision. Defined Lines: Regularly clean up edges for a polished look. Use Philips All-in-one Trimmer (MG9551 model) for this. It comes with 13 attachments for trimming, body grooming, nose and ear hair trim and even eyebrow styling. Step 5: Finishing/Routine Touches Trim It Back: Keep your beard at the desired length effortlessly with the Philips Pro Beard Trimmer. Its 2.5x higher precision and 20-length settings (ranging from 0.4 mm to 10 mm) make achieving and maintaining your preferred style easy. The lift and trim system ensures every hair is perfectly aligned with the titanium blades, giving you a precise and even cut every time. Assess Your Needs: As you grow your beard, you need precision tools and follow good grooming practices. Our Philips Body Trimmer (BG3007 model) can be your all-in-one tool. It not only can trim your facial hair but also body hair, thanks to its patented pearl tips and hypo-allergenic foil, making the trimmer suitable for overall grooming. Revamp Your Routine: Experiment with styles and update your grooming kit. The Philips All-in-One Trimmer (MG7920 model) is perfect for head-to-toe grooming, with 13 tools to style your beard and even body hair. The BeardSense technology adapts to your beard density, and the 5-minute quick charge ensures you're always ready for a quick trim. Choose Quality Products: Invest in trusted brands like Philips for long-lasting and best beard grooming tools. Products like the Pro Beard Trimmer, OneBlade, and All-in-One Trimmer combine advanced technology with skin-friendly features, ensuring optimal results with every use. Make 2025 the Year of Perfect Beard Grooming with Philips Beard grooming in 2025 is about personalization, precision, and care. Whether you aim for a bold lumberjack look or a refined corporate style, the right tools, and routine will ensure your beard remains a statement of confidence and style. Embrace these resolutions and make 2025 your most dashing year yet. Facebook Twitter Email Pinterest Face first Explore our full range of tools to shave, groom and style See all > You might like Read all articles > How to Grow a Scruffy Beard Read the article > Give your beard a border: The perfect beard neckline Read the article > html {scroll-behavior: smooth;}
Read More
Epilators for Effortless Hair Removal: Your Secret Weapon for the Wedding Season Wedding season is here and it's time to look your best for every occasion. Whether it’s the mehendi, sangeet or wedding day, having smooth and glowing skin is essential. An epilator can be your go-to tool for effortless hair removal at home, giving you salon-like results without the hassle. Like waxing, epilators remove hair from the roots, offering long-lasting results that are perfect for this busy season. Here’s why an epilator is the ultimate grooming companion for the wedding season: 1. Long-Lasting Smoothness for All Wedding Events Epilators remove hair from the root, leaving your skin silky smooth for weeks. This makes them perfect for the wedding season, where you want to look flawless from morning rituals to evening parties. Philips makes epilators with long tweezers and wide heads to remove hair faster, saving time during your busy schedule. Your skin stays smooth through all celebrations 2. Effortless Grooming Anytime, Anywhere No time for salon visits during the wedding rush? Keep a gentle hair removal tool handy at home. Philips epilators are compact and easy to use. They are perfect for last-minute touch-ups before events. You don't need to worry about parlour appointments before sangeet or reception, they fit seamlessly into your schedule, ensuring you look your best. 3. Gentle and Ideal for Sensitive Areas Wedding outfits often highlight your arms, legs, or underarms. Epilators are not harsh on the skin and work well on delicate areas. The Philips cordless hair epilator range is suitable for facial hair removal. It is designed with a cap that ensures optimal contact with the skin, preventing irritation and pulling. It is shower-friendly, allowing you to use it during a warm shower for added comfort and convenience. 4. Precision For All Hair Types Epilators work well on all types, whether your hair is thin or thick. With two speed settings, you can adjust the device for thicker hair on areas like the legs using the higher speed, while the lower speed is perfect for more sensitive areas like the face or underarms. The Philips 2-in-1 Shaver and Epilator help you in two ways. It comes with a head that shaves your hair and a comb that trims your hair. You can use these to shave close to your skin or gently trim different body parts Want even better results? Try the Philips Cordless Epilator. It has a shaving head, a trimming comb, and a wide epilation head, making it ideal for quick and efficient hair removal. These features make it easy to manage different areas of your body, ensuring smooth and polished results from head to toe. 5. Easy to Use and Maintain Hair removal is easier with Philips epilators. They design epilators to fit your hand perfectly. They won't slip when you reach tough spots like the back of your legs. Philips Cordless Epilators range also features a built-in opti light to help you spot tiny hairs that you might miss otherwise. Cleaning is easy too—just detach the head and rinse it under water. Philips also provides interchangeable caps for different areas, ensuring hygienic and effective results every time. Get smooth and radiant skin this wedding season with a grooming tool that saves you time and frequent salon visits. Epilators remove hair gently and work well for everyday use. Philips offers different grooming and styling tools including hair removal epilators, trimmers, hair straighteners, hair dryers, etc. to help you look your best. .p-heading-02 { letter-spacing: -.5px; font-size: 21px; line-height: 40px; color: #050505; font-weight: 700; margin-bottom: 24px; } .p-heading-03 { letter-spacing: -.2px; font-size: 21px; line-height: 26px; color: #050505; font-weight: 700; margin-bottom: 13px; } .p-heading-01 { letter-spacing: -1px; font-size: 32px; line-height: 50px; color: #050505; font-weight: 700; margin-bottom: 21px; } Discover beauty Whether you're looking for haircare or hair removal, Philips has the right beauty tools and tips for you. View all Read all articles >
Read More
Grooming Gifts That Matter: Why Beard Trimmers Are the Ultimate Choice This Wedding Season Wedding season is here, and finding the perfect gift for men can be tricky. If you want to give something thoughtful and practical, a beard trimmer is an ideal choice. Grooming is an essential part of every man’s routine, especially during weddings when everyone wants to look their best. A beard trimmer is versatile, easy to use, and helps maintain a polished look, making it a great wedding gift. Here are the top reasons why beard trimmers make the ultimate grooming presents this wedding season: 1. Versatile Trimming for Every Beard Style A beard trimmer is a great tool for men who like experimenting with their look. Whether it’s a clean, sharp trim or a stylish, well-groomed beard, trimmers with adjustable length settings make it easy to achieve any style. The Philips Pro Beard Trimmer and Styler offers 20 adjustable length settings between 0.4mm to 10mm, making it ideal for creating precise looks for different wedding events With Beardsense technology, this trimmer adapts to the density of your beard 125 times per second, ensuring consistent results across all beard types. It’s perfect for men who enjoy switching up their grooming routine with minimal effort. 2. Professional Grooming at Home Beard trimmers let men achieve a salon-like look right at home. There’s no need to rush to the barber for regular trims. The Philips SkinProtect Beard Trimmer range, with its skin-protect comb, allows for safe and irritation-free grooming. Plus, its 3 weeks of cordless use on a single charge makes it perfect for busy wedding schedules. For those who want professional-level precision, the Philips Pro Beard Trimmer and Styler provides long-lasting performance with its 90 minutes of cordless use after just one hour of charging. 3. Durable and Reliable Design A quality beard trimmer does more than just a basic trim—it’s built to last. Philips trimmers come with skin-friendly, self-sharpening blades that remain effective for years without needing frequent replacements. The Philips Beard Trimmer Skin-Friendly range offers 10 length settings and provides 60 minutes of cordless use, making it a reliable and efficient choice. With warranties of up to 3 years, these trimmers ensure durability, making them a thoughtful gift that will be appreciated long after the wedding season. 4. Gentle and Comfortable Grooming Skin irritation or cuts are common worries for men when grooming. That’s why Philips trimmers focus on comfort with skin-friendly blades and skin-protect combs that glide smoothly across the skin, preventing irritation and ensuring a gentle grooming experience. For thicker beards, advanced trimmers like the Philips Pro Beard Trimmer and Styler automatically adjust to beard density, offering seamless trimming without pulling or discomfort. This makes it the perfect gift for men who value comfort alongside precision. 5. Low Maintenance, High Performance Philips makes trimmers that you can use and clean easily. Features like self-sharpening blades and long-lasting batteries reduce the need for frequent maintenance. The SkinProtect Beard Trimmer range, for example, offers hassle-free grooming with its 3 weeks of use on a single charge. The Pro Beard Trimmer and Styler range takes it a step further, delivering 90 minutes of cordless use with just an hour of charging, ensuring consistent performance even during busy schedules. The Perfect Wedding Gift Beard trimmers are the ideal gift for the wedding season. They are easy to use and gentle on the skin. Philips Beard Trimmer range has Skin-Friendly Beard Trimmer and the Pro Beard Trimmer and Styler. They cater to every need, ensuring precise and effortless grooming. By gifting a high-quality trimmer, you’re not just giving a tool—you’re offering the gift of confidence, style, and a polished look that lasts through every wedding celebration. .p-heading-02 { letter-spacing: -.5px; font-size: 21px; line-height: 40px; color: #050505; font-weight: 700; margin-bottom: 24px; } .p-heading-03 { letter-spacing: -.2px; font-size: 21px; line-height: 26px; color: #050505; font-weight: 700; margin-bottom: 13px; } .p-heading-01 { letter-spacing: -1px; font-size: 32px; line-height: 50px; color: #050505; font-weight: 700; margin-bottom: 21px; } Discover beauty Whether you're looking for haircare or hair removal, Philips has the right beauty tools and tips for you. View all You might like Read all articles > How to Grow a Scruffy Beard Read the article > Give your beard a border: The perfect beard neckline Read the article > .p-heading-02 { font-size: 20px; line-height: 0; } .p-body-copy-01 { font-size: 14px; line-height: 10px; } p.p-body-text.p-text-smaller { margin-bottom: 0; } .full-width .containerpar { padding: 0; padding-left: 7px; }
Read More
Top 5 Reasons to Gift a Philips Hair Straightening Brush This Wedding Season Many people give up halfway through achieving naturally straight and frizz-free hair. It either takes too long or can damage their hair. But this can be effortless and safe with the right tool, like a hair straightening brush. Combining the benefits of a hairbrush and a straightener in one, these brushes detangle hair and minimise heat damage The wedding season is all about looking your best with different hairdos. Quick and easy hairstyles are a blessing with the hustle and bustle of celebrations. A Philips Hair Straightening Brush makes the perfect wedding season gift. 1. Quick & Easy Styling for Busy Wedding Events Wedding rituals and events demand you look your best, often with limited preparation time. Philips Hair Straightening Brushes, like the KerashineCare Straightener Brush, are designed for quick, efficient styling. With ThermoProtect Technology, you can achieve frizz-free, naturally straight, and glossy hair in just a few minutes, saving precious time for other preparations. Thanks to the Triple Bristle Design, the brush detangles, smoothens and straightens your hair simultaneously while protecting your scalp from burns. It’s as simple as brushing your hair, yet the results are polished and professional. 2. Minimized Heat Damage with ThermoProtect Technology Excessive heat is a common concern with styling tools. Philips tackles this with ThermoProtect Technology, which ensures even heat distribution, preventing overheating and damage to your hair. The keratin-infused bristles add a natural shine while protecting hair cuticles, ensuring styling remains gentle and effective. Whether you’re using the brush daily or occasionally during wedding season, you can trust it to be safe while delivering salon-like results. 3. Perfect for All Hair Types Everyone’s hair is different and Philips makes sure their hair straightening brushes cater to a variety of hair types. Whether you have straight, wavy or curly hair, these brushes offer customizable temperature settings. The Triple Bristle Design in brushes and 2 temperature settings ensure that you get consistent results without putting too much heat on any one section of your hair. For those with fine or damaged hair, this is a particularly thoughtful gift. You can get the Philips Kerashine or ThermoProtect range that has multiple heat settings that allow you to customize the temperature based on your hair type, ensuring gentle, effective hair styling without risking hair health. 4. Enjoy Smooth, Glossy Hair All Day Frizz is one of the most common hair concerns, especially during humid seasons. Philips hair straightener brushes combat frizz with their Keratin-Infused Bristles and ThermoProtect Technology, both designed to lock in moisture and add shine to your hair. This tool not only detangles but also makes hair appear healthy and shiny, perfect for day-long weddings that transition from pujas to sangeet nights. No more worrying about touch-ups in the middle of the festivities. 5. User-Friendly and Safe Design Hair styling should not feel like a burden. Philips hair straightening brushes are lightweight and are designed for easy use. The brushes are designed with user comfort in mind. Choose Philips Hair Straightening Brush as the ultimate wedding season companion—for you or someone special. With minimal heat damage, quick styling, and sleek, glossy results, it’s the perfect addition to any celebration .p-heading-02 { letter-spacing: -.5px; font-size: 21px; line-height: 40px; color: #050505; font-weight: 700; margin-bottom: 24px; } .p-heading-03 { letter-spacing: -.2px; font-size: 21px; line-height: 26px; color: #050505; font-weight: 700; margin-bottom: 13px; } .p-heading-01 { letter-spacing: -1px; font-size: 32px; line-height: 50px; color: #050505; font-weight: 700; margin-bottom: 21px; } Discover beauty Whether you're looking for haircare or hair removal, Philips has the right beauty tools and tips for you. View all Read all articles >
Read More
Everyday Hair Care: Why a Hair Straightening Brush is Your Go-To Styling Tool? Want a naturally straight and frizz-free look every day but worried about heat damage and limited time? Mornings can be hectic, especially when you're rushing for work and finding the time to style your hair can feel impossible. That’s where a hair straightener brush makes all the difference. It combines gentle styling and easy brushing, giving you a polished look in a fraction of the time without excessive heat damage. Let's see why you should consider a straightening brush for everyday use, how exactly does it work and what makes it an ideal tool for achieving a naturally straight look effortlessly. What Does a Hair Straightener Brush Do? A hair straightening brush brushes and straightens your hair at the same time. It doesn't clamp your hair. Instead, you comb your hair and it detangles as you go. Such products for example, the Philips Hair Straightening Brush can get you frizz-free hair in just 5 minutes. The ThermoProtect Technology maintains an optimal temperature to prevent overheating and protect your hair from heat damage. The keratin-infused bristles make them shiny and smooth. It is a quick way to smooth your hair without using many tools. How a Hair Straightener Brush Works? A hair straightener brush uses gentle heat, distributed evenly through its fine bristles, to style your hair smoothly avoiding direct contact with the scalp. You can use it every day safely. The Philips Hair Straightener Brush with SilkProtect Technology has three kinds of bristles. This keeps your scalp safe from burns. You can also change the heat to match your type - curly, wavy, or straight. You don't need to section your hair into small parts with the brush. This makes it faster and easier to use every day. Why Hair Straightening Brush is a Better Choice? There are many reasons why you might like a hair straightener comb more than other tools. It is easy to use, works well and does not damage your hair as much. 1. Quick and Efficient Styling A straightening brush saves you time. You can smooth your hair in minutes. This is great for busy mornings or quick touch-ups. You can consider Philips Hair Straightener Brush for Everyday Styling. It makes your hair smooth and frizz-free in just 5 minutes. It's a fast way to get a sleek hairdo when you are in a hurry. 2. Gentle on Hair You could accidentally get burns with straighteners if they touch your scalp or skin. Models like the Philips Hair Straightener Brush with SilkProtect Technology have a triple bristle design to spread the heat evenly through the bristles. This styles your hair with minimised heat damage. It is gentle on your scalp and you are less likely to hurt yourself. 3. Get Frizz-Free and Glossy Hair Frizzy hair is a common problem, especially if you have wavy or curly hair. A hair straightener brush fixes frizz by smoothing your hair as it brushes. If the bristles have keratin, it adds shine to your hair. It reduces frizz and makes it look healthy every time you use it. 4. Customizable for Different Hair Types A straightening brush often has adjustable temperature controls. This makes it good for all kinds of hair - thin, thick, wavy or curly. The Philips Hair Straightener Brush has 2 temperature settings for different types and needs, offering customized care that prevents unnecessary damage. 5. Multi-purpose Tool That Saves Space With a hair straightener brush, you do not need many tools to make your hair look naturally straight. It serves multiple functions by detangling, smoothing, and straightening your hair. This means less clutter on your dresser. It is a good investment that does not take up much space and you can use it every day. A hair straightener brush is a versatile styling tool that should be part of your daily routine. It offers the convenience of quick, safe haircare while delivering smooth and frizz-free results. With features like KerashineCare Technology, ThermoProtect, and adjustable heat settings, the Philips range of women's personal care products including hair dryers, straightener brushes and combs gives you the flexibility to smooth your hair effortlessly, regardless of your hair type. You can get salon-quality hair at home. So, why not make the switch and experience the difference yourself? .p-heading-02 { letter-spacing: -.5px; font-size: 21px; line-height: 40px; color: #050505; font-weight: 700; margin-bottom: 24px; } .p-heading-03 { letter-spacing: -.2px; font-size: 21px; line-height: 26px; color: #050505; font-weight: 700; margin-bottom: 13px; } .p-heading-01 { letter-spacing: -1px; font-size: 32px; line-height: 50px; color: #050505; font-weight: 700; margin-bottom: 21px; } Discover beauty Whether you're looking for haircare or hair removal, Philips has the right beauty tools and tips for you. View all Read all articles >
Read MoreThe Importance of Heat and Speed Settings In Hair Dryers Have you ever pondered the reason behind the multiple heat and speed options on your hair dryer? Those settings offer more than just the convenience of customizing your hair-drying routine; they serve important functions beyond simply drying your hair. Let's take a deep dive into the science behind the heat and speed settings, exploring their diverse roles in achieving both healthy and stylish hair with Philips EssentialCare, HP8120/00. Let’s Understand the Crucial Role of Heat and Speed Settings in Hair Dryers Precise Drying Ah, let's dive into the world of spell-setting! First off, we have the magic of precision drying. Picture this: The speed settings on your trusty hair dryer are like controlling the wind's power. When you crank it up to high speed, it's perfect for whisking away excess water in a flash, especially when time is not on your side. On the flip side, opting for low-speed settings is a game-changer for that meticulous drying and styling session. It lets you focus on specific spots without messing up the rest of your fabulous 'do. Philips Essential Care offers you 3 pre-selected heat and speed settings for cool, caring, or quick drying. Preventing Heat Damage Now, onto our next gem: preventing heat damage. The trick here is to pair low heat with a blast of high-speed airflow. This winning combo works wonders at banishing any heat-related woes. Say goodbye to frying your precious locks at scorching temperatures because this method ensures efficient drying without exposing your hair to prolonged heat. So to prevent that, you can use a Philips hair dryer. With its cool air setting, it allows you to dry hair at a relatively low temperature to minimize damage, which is suitable for especially fine, dry, and damaged hair. Minimizes Frizz Heat has a knack for smoothing down hair cuticles, diminishing frizz, and leaving your strands looking lustrous and well-kempt. Nevertheless, it's crucial not to go with high temperatures, as excessive heat might strip away moisture from your locks. To tackle this issue, an innovative technology has emerged: Philips EssentialCare with ThermoProtect technology, which provides optimal drying temperature while also providing additional protection. The ThermoProtect optimal airflow and heat combination allows you to quickly dry your hair without overheating, maintaining your hair's natural moisture level, for shiny locks. Customizable Drying And let's not forget about customizable drying tailored to suit different hair types. We all know that hair comes in various textures and lengths, making each mane unique. That's where speed settings swoop in to save the day by offering a personalized touch based on your specific needs and preferences. For instance, folks with thick and unruly tresses might find solace in the strong gusts of high-speed airflow, while those with delicate strands may opt for a more delicate approach. For a customizable result, use Philips EssentialCare. This hair dryer for women offers fast drying and a fast air setting that offers higher temperatures and more powerful airflow. Meanwhile, the power of 1200 watts enables you to dry your hair efficiently and gently for beautiful results every day. Styling Flexibility Heat settings also play a crucial role in hair styling. Higher heat levels can change your hair from straight to voluminous. Meanwhile, lower heat settings are gentler on your hair and suitable for everyday drying without damaging it. Philips hair dryers for women offer concentrators that focus the airflow for a polished, shiny look. Style Your Hair Everyday Beautifully with Philips Hair Dryer By understanding how these settings work, you can tailor your hair care regimen to suit your specific needs while minimizing the risk of damage. Philips hair dryers are equipped with heat and speed settings to cater to different hair types and styling requirements. Some hair dryers for women come with multiple heat settings to cater to diverse needs. The Philips Hair Dryer, Essential Care, HP8120/00, comes with 3 speeds and heat settings for better drying and styling. It’s powerful, making it the perfect blend of power, style, and technology. .p-heading-02 { letter-spacing: -.5px; font-size: 21px; line-height: 40px; color: #050505; font-weight: 700; margin-bottom: 24px; } .p-heading-03 { letter-spacing: -.2px; font-size: 21px; line-height: 26px; color: #050505; font-weight: 700; margin-bottom: 13px; } .p-heading-01 { letter-spacing: -1px; font-size: 32px; line-height: 50px; color: #050505; font-weight: 700; margin-bottom: 21px; } Discover beauty Whether you're looking for haircare or hair removal, Philips has the right beauty tools and tips for you. View all Read all articles >
Read More9 Grooming Essentials for Men and Women to Shine This Navratri Season Navratri is here! The excitement for garba nights, shiny clothes, and vibrant festivities is building up. Grooming plays an important role in helping you look and feel your best from head to toe. Both men and women need grooming to get glowing skin, styled hair, and a clean look. The old idea that only women need grooming is wrong. Men also care about their skin and hair to look and feel good. This Navratri, as you shop your lehenga and kurtas, don’t forget to update your grooming routine too. From removing unwanted hair from skin to keeping your hair styled just right, let’s explore the top 9 grooming essentials that will help you feel your best all 9 nights. 1. Hair Straightener Women need a hair straightener for Navratri. Straight hair or soft waves make you look great for the festival. You want your hair to stay nice all night while you dance and have fun outside. The Philips Hair Straightener can help you style your hair well and safely. It uses special NourishCare and KerashineCare methods to protect your hair from heat. These create a shield on your hair to keep it moist and shiny. Your hair won't get frizzy, and it will stay healthy. You can use it at home to make your hair look like you went to a salon. This will help you look amazing for all 9 nights of Navratri. 2. Grooming Trimmer Looking good can make you feel more confident when you dance all night. For Navratri, men need a grooming trimmer that can handle both beard and body hair. Try the Philips All-in-One Trimmer. It has 13 tools and a special head for precise trimming. You can easily style your face and body hair with it. The two blades give you a pro-level finish. It offers a seamless experience, making it easier than ever to achieve the perfect look for all dandiya and garba nights. 3. Facial Hair Removal Razor Do you want to get rid of unwanted facial hair? Facial hair removal tools have emerged as convenient and painless solutions. For women, the Philips Facial Hair Remover is perfect with its wide hypoallergenic head, providing a gentle and pain-free experience right at home. The Philips OneBlade Trimmer is men's grooming essential for Navratri. It offers precision trimming, perfect for trimming or removing facial hair. Philips facial hair remover can get you a smooth, hair-free complexion or simply refine your look, ensuring you feel confident and ready for any festive occasion like Navratri. 4. Oral Hygiene For that radiant, confident smile, keeping a check on your oral hygiene plays a crucial role. Electric toothbrushes and flossers are Navratri grooming essentials for men and women to maintain excellent dental health. A flosser removes debris and food particles between teeth and along the gumline. It reduces the risk of gum disease. The electric toothbrush, such as the Philips Sonicare, offers superior cleaning and whitening capabilities, ensuring your smile stays bright and radiant throughout the festivities. 5. Epilator The Philips Epilator helps you look great in your festive clothes like sarees or lehengas. It makes your legs and arms smooth and silky. This tool fits well into your beauty routine. It has two speeds, so you can use it on thin or thick hair. You can hold it easily, and it won't hurt your hands. It also has a special cap for gentle areas like underarms and bikini lines. With smooth skin, you'll look perfect in any outfit you wear. 6. Hair Dryer and Styler Combo Your Navratri outfit is incomplete without perfectly styled hair. A hairdryer and styler is a Navratri grooming essential for men and women, you want your hair to look flawless all night long. Whether you’re looking to straighten, curl, or add volume, this kit has you covered. A great tool to add to your grooming routine this festive season is the Philips Styling Kit – Hair Straightener and Dryer Combo. With its SilkProtect Technology, you can easily achieve that perfect salon-like look at home. The ceramic plates on the straightener ensure smooth and easy gliding, while its fast heat-up time of just 60 seconds saves you valuable time before heading out. The 1000W dryer provides gentle drying power with a compact, ergonomic design for easy handling, making it ideal for achieving a flawless hairstyle every day. 7. Men’s Hair Styling Brush A brush for men's hair helps you look neat easily. A good brush lets you make many hairstyles. You can make your hair straight and smooth or full and wavy. This helps you look great at all the fun parties. The Philips Men's Air Styler is a great choice. This brush dries and styles your hair at the same time. It's perfect when you're in a hurry for Navratri nights. It has argan oil in it. This oil feeds your hair and keeps it safe from heat. It also makes your hair shiny and healthy. You can pick different heat settings. This lets you dry your hair just right for your hair type. You can get a hairdo that looks like it's from a salon, right at home. 8. Beard Trimmer No one wants a messy beard, especially with dandiya nights coming up this Navratri. Facial hair plays a big role in men’s grooming, and an unkempt beard can look unhygienic and give off the wrong first impression. If you're particular about your beard’s style and length, a trimmer is the perfect tool to keep it neat. With Philips Skin Friendly Beard Trimmer, featuring 10-length settings and up to 60 minutes of run time, maintaining a beard has never been easier. You can do a professional quality trim at home, saving the multiple trips to the salon. You can do a clean shave or a well-groomed beard, the Philips trimmer is certainly a men's grooming essential for Navratri. 9. Bikini Razor The bikini area is delicate and sensitive. It requires special attention. Women need a reliable intimate area trimmer or razor that gives them a flawless finish. The Philips Bikini Trimmer is a women's grooming essential for Navratri. With its skin protection features, rounded tips, and ergonomic grip, ensures a comfortable grooming experience. Its curve-friendly design makes trimming and shaving hassle-free, leaving the skin smooth and irritation-free for longer. Whether you’re prepping for Navratri or just maintaining your routine, this trimmer helps you achieve a flawless look with ease. .p-heading-02 { letter-spacing: -.5px; font-size: 21px; line-height: 40px; color: #050505; font-weight: 700; margin-bottom: 24px; } .p-heading-03 { letter-spacing: -.2px; font-size: 21px; line-height: 26px; color: #050505; font-weight: 700; margin-bottom: 13px; } .p-heading-01 { letter-spacing: -1px; font-size: 32px; line-height: 50px; color: #050505; font-weight: 700; margin-bottom: 21px; } Discover beauty Whether you're looking for haircare or hair removal, Philips has the right beauty tools and tips for you. View all Read all articles >
Read MoreGet Smooth Skin for Weeks with Epilation 2 min read You just shaved yesterday, and voila. The first hairs start showing up in the morning. How vexing. More so in summer when you want to go out to the beach on an impulse or hang out with your friends. Well, epilation is here to help you stay in smooth skin for weeks. Debunking the Pain Myth of Epilation Epilating does not attract many, as most of them subscribe to the idea that "Epilating hurts." Contrary to this notion, epilation is much less painful than one can imagine, especially when it is done properly and with the right epilator. Here, you will get the answers to all the important questions on epilation: What is epilating? How long does it last? And most importantly, how to epilate correctly? What is Epilating? Epilation is a hair removal technique that pulls out hair, together with its root. While it does sound painful, learning to epilate in the right way makes it less painful than waxing or sugaring—both of which remove hairs from their roots. How Does an Epilator Work? An electric epilator pulls hair with the help of rotating discs. The right epilator will definitely make the process much faster with less discomfort. Look for an epilator that rotates fast enough to reduce that uncomfortable feeling of pulling on the skin as much as possible and get your epilating done within minutes. Features of Modern Epilators This is also evident in how modern epilators have features that will make epilating easier and more comfortable. For instance, the Philips Satinelle Prestige Epilator has an inbuilt Skin Stretcher that will stretch your skin in such a way that it becomes more comfortable. How Long Does Epilating Last? Epilation results can last two to three weeks, depending on the speed of your hair regrowth. Since the root of your hair is removed, usually, the new hair that grows back is softer and finer. Get the right epilator, and with the right techniques, enjoy smooth, hair-free skin for weeks. No more shaving daily—hello, easy epilation. Step1: Treat Your Skin to Something Good: Preparation Before you reach for your epilator, ensure your hairs are no longer than five millimeters. The Satinelle Prestige, with its broad ceramic head, gently removes even fine hairs that are four times shorter than what waxing can handle. Shorter hairs make epilation more comfortable, so trim longer hairs first. The Satinelle Prestige includes a trimming head and comb, or you can use the Philips Pen Trimmer for smaller or more delicate areas.
Read MoreHow to Use an Epilator Without Minimal Pain BRE235-00 2 min read We’ve all been there: you give your face and body a smooth shave, but then by the next day you’re already seeing the first hair strand growing back. Epilators can be a solution to your problem here, as the epilation method removes the hair from the root. But what about knowing how to use the best epilator to enjoy weeks of smooth skin without minimal pain? So if you are pondering over this question, then you’ve come to the right place! Philips, a No. 1 brand in personal care, offers the best epilators, but we are putting the spotlight on BRE235-00. It offers a painless skin removal process at home. Whether you're an epilation novice or considering a switch from other methods, this model boasts advanced features that guarantee weeks of smooth, stubble-free skin. Take a read-out on how to use an epilator for your best hair removal experience ever! Why Choose Philips Epilators for Minimal Pain • Experience Lasting Smoothness: While shaving merely trims hair at the skin's surface, Philips epilators like the BRE235/00 feature a powerful epilation system that uproots hair from the root, leaving your skin velvety smooth and free from hair for extended periods. Bid farewell to frequent shaving by incorporating this body and face epilator into your regular routine. • Gentleness on Delicate Areas: The inclusion of a sensitive area cap in this hair removal tool makes it ideal for treating sensitive spots like underarms and bikini lines with care. The cap ensures gentle and pain-free hair removal, catering even to the most delicate skin types effortlessly. • Two-Speed Settings: Tailored to suit your needs, this body and face epilator offers two-speed settings. Opt for a lower speed for delicate areas like the underarms and bikini lines. Whereas switch to a higher speed for more areas with thicker hair. This customization guarantees a painless and effortless hair removal experience with every stroke. • Easy-to-Clean: Hygiene is key when it comes to grooming tools; hence, Philips has designed this epilator with washable head features. The washable head of this women's epilator allows you to rinse it under running water, ensuring optimal cleanliness and prolonging the longevity of your device. • Ergonomic Design: Recognizing the importance of comfort during grooming rituals, Philips has crafted this hair removal with an ergonomic grip that fits snugly in your hand. Enjoy maximum control and ease of use while effortlessly achieving flawless results. • Sensitive Cap: For those sensitive and tricky-to-handle spots on your body, such as underarms and bikini lines, this women's epilator includes a delicate area cap tailored specifically for painless removal of unwanted hairs without any fuss or discomfort. Enjoy the Effortless and Painless Hair Removal with Philips Epilator Wave goodbye to tedious shaving routines as you welcome the efficiency of the Philips epilator BRE235/00 into your life. With cutting-edge technology, gentle treatment towards sensitive areas, and user-friendly design elements all combined in one sleek model, prepare yourself for a seamless and comfortable journey towards achieving perfectly groomed skin without any hassle or pain associated with traditional methods. .p-heading-02 { letter-spacing: -.5px; font-size: 21px; line-height: 40px; color: #050505; font-weight: 700; margin-bottom: 24px; } .p-heading-03 { letter-spacing: -.2px; font-size: 21px; line-height: 26px; color: #050505; font-weight: 700; margin-bottom: 13px; } .p-heading-04 { letter-spacing: -.2px; font-size: 18px; line-height: 26px; color: #050505; font-weight: 700; margin-bottom: 13px; } .p-heading-01 { letter-spacing: -1px; font-size: 32px; line-height: 50px; color: #050505; font-weight: 700; margin-bottom: 21px; } Discover beauty Whether you're looking for haircare or hair removal, Philips has the right beauty tools and tips for you. View all Read all articles >
Read More© Philips Personal Care B.V. 2025
Cookies are small text files that are downloaded onto your device when accessing this website and may entail sharing of data with 3rd parties. read more...

